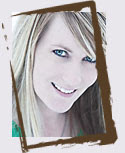
Pour cette création, j'ai décidé d'exploiter la photo en lui donnant un effet de bande dessinée. Il faut dire que la collection Retour vers le futur de Sultane s'y prête à merveille!!! For this creation, I decided to exploit the picture by giving it a comic book effect. Let's just say that Sultane Retour vers le futur collection go marvelously with that effect!!!

Comment donner un effet bande dessinée à votre photo? Le montage photo a été réalisé dans le logiciel PhotoShop CS4, mais il est possible d'obtenir un résultat similaire avec Photoshop Elements 7. Ouvrez votre photo et faites un ajustement des couleurs pour ajouter du contraste à votre photo. Allez à ACCENTUATION > NIVEAUX AUTOMATIQUES. How to give a comic book effect to your picture? The photo montage was realized in Photoshop CS4 software, but it is possible to obtain a similar result with Photoshop Elements 7. Here’s how to do it with Photoshop Elements. Open your picture and do a contrast adjustment to your picture. Go to ENHANCE> AUTOMATIC LEVELS.

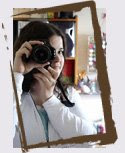
La prochaine étape : donnez un effet de mauvaise qualité à votre photo en ajoutant des grains. Allez à FILTRE > ARTISTIQUES > GRAIN PHOTO. J’ai utilisé GRAIN : 4, ZONES CLAIRES : 0, INTENSITÉ : 10. The next step : give a bad quality look by adding some graininess to the picture. Go to FILTERS > ARTISTIC > FILM GRAIN. I used : GRAIN: 4, HIGHLIGHT AREA: 0, INTENSITY: 10.

Dupliquez ce calque. Duplicate the layer.

On applique maintenant sur le calque COPIE un second effet. Allez à FILTRE > PIXELLISATION > DEMI-TEINTE COULEUR. Selon la taille de votre photo, mettre le RAYON MAXI entre 4 et 6. Laissez les autres paramètres par défaut. Allez à la palette CALQUE et choisir l’option OBSCURSIR. We now apply to the COPIE layer a second effect. Go to FILTER > PIXELATE > COLOR HALFTONE. Depending on the size of your picture, set MAX RADIUS between 4 and 6. Leave the rest with the default values. Go to the LAYERS PALETTE and set the BLENDING MODE to DARKEN.

On ajoute maintenant nos éléments graphiques. Fusionnez les calques visibles à partir du menu calque. Ajoutez un cadre : EDITION > CONTOUR DE LA SELECTION. J'ai utilisé CONTOUR : 30x, COULEUR : #F5ECE1, POSITION : INTERIEUR. Now we add our graphic elements. Merge the visible layers from the menu layers. Add a frame : EDITION> CONTOUR SELECTION. I used CONTOUR: 30x, COLOR: # F5ECE1, POSITION: INTERIOR.

À l'aide de l'outil RECTANGLE, créez une boite orange. Sélectionnez le calque puis, à partir du menu calque, SIMPLIFIER LE CALQUE. Ajouter un CONTOUR de 10x. Refaire la même étape pour la boite blanche. Create an orange box by using the RECTANGLE tool. Select the layer and, from the menu layer, SIMPLIFY the layer. Add CONTOUR 10x. Repeat this step for the white box.

Pour le contour de la photo, créez un nouveau calque. Avec l'outil de SÉLECTION, faites un cadre autour de la photo et appliquez un CONTOUR de 10x. For the photo outline, create a new layer. With the selection tool, make a frame around the photo and apply a 10x CONTOUR.

Pour le texte, j'ai utilisé la police gratuite Digital Strip. Si vous voulez une lettre rouge, écrivez-là de la couleur de votre choix, SIMPLIFIER LE CALQUE puis ajoutez un CONTOUR vers l'EXTERIEUR cette fois. For the text, I've used the free font Digital Strip. If you want a red letter, just write it in the color of your choice, then SIMPLIFY the layer and add a EXTERIOR CONTOUR this time.
Voici le résultat final. Here's the final result.

Matériel/Supplies
Papiers et Transparent / Papers & Transparent
Sultane - Retour vers le futur
Hambly - Mod Circles
Carton
Bazzill
Lettrages / Lettering
Pink Paislee - Holly Doodle
American Craft - Thickers (Puffy stickers Umbrella)
Crayon / Pen
Uniball Signo - Blanc / White
Prosca - Vert clair et Rose / Light green & Pink
Embellissements / Embellishments
Boutons / Buttons - Kimmieprout
Ruban / Ribbon - Inconnu / Unknown
Remarks Accent Stickers - American Craft (Fashion Accents 2)
Pastique fou / Shrink Plastic - Judi Kins


.jpg)


1 commentaire:
J'adore l'effet BD et ta page! merci beaucoup pour tes explications claires et précises; je vais l'essayer!
Enregistrer un commentaire